Sunday, April 5, 2020

Excellent Chicken Enchiladas

CHICKEN ENCHILADAS
Excellent

Terri Costley
Prep time: 45 mins.
Cook time: 20 mins.

Ingredients:

Pkg. of at least 16 corn tortillas (I like Guerrero because they hold together well & I get a package of at least 20)

1 Rotisserie Chicken – debone and shred the chicken up
2 small cans of diced green peppers
2 tsp. cumin powder
2 tsp. garlic powder
2 tsp. smoked paprika
½ C of chicken stock
½ can of Cream of Chicken Soup (You will use the other half in the sauce)
*Mix together and heat on low to mix the flavors.  After heating up, turn off heat and keep near)

2 cans of refried beans
Heat on low:  (When warmed up, turn off the heat)

Heat on low in a separate frying pan:
3 Cans of Enchilada Sauce 15 oz  (I like the Hatch brand – Red Medium)
½ can of Cream of Chicken soup (This adds some thickness and takes the spice level down) 

2 Cups of shredded Sharp Cheddar and Jack cheeses

Garnish:  Chopped cilantro leaves, chopped lettuce, chopped scallions, 
sour cream, chopped tomatoes (Pico de gallo), guacamole.

Guacamole

2 Avocados – mashed up
½ lime zest and juice
½ C diced yellow onion 
Tlb. chopped fresh cilantro
½ tsp. salt 
1 tsp. minced garlic
1 pinch ground cayenne pepper
¼ C pico de gallo/or diced tomatoes

Mash together the avocados, lime juice, and salt. Mix in onion, cilantro, tomatoes, and garlic.  Stir in cayenne pepper.  Refrigerate 1 hour for best flavor or serve immediately.


DIRECTIONS:

Now the fun begins!

 Take the tortillas and put them close to the sauce.  Have an11 x 13 casserole dish close to all the heated pans.  Cover the bottom of the casserole dish with sauce.  This is what you are putting the enchiladas in.
Put three corn tortillas in the sauce and let them warm up so you can roll the enchilada.  With tongs, pull out the first tortilla.
With two spoons spread a spoon full of refried beans in the middle of the tortilla.
With tongs, put the chicken mixture in on top of the beans.
Put a small amount of cheese on top of meat.
Roll the tortilla up and move it seam side down to the side of the dish.
Continue this until you are done using up all the beans and meat.
*Remember to keep the tortillas going into the hot sauce so they have time to warm up before you start to put the beans and meat in them. If for some reason you have to step away to do something, don’t leave the tortillas in the sauce.  Because if they get too warmed up, they will fall apart. J
*(Sometimes I have more than will fit into this pan, so I put the rest in a smaller dish and freeze it for another day)

You should have cheese and sauce left over.

Take the sauce and spoon it over all the enchiladas.
Take the rest of the cheese and put it on the enchiladas.

Now cook for 20 minsUntil you can see the sauce bubble.

You now have a delicious pan of Chicken Enchiladas.
Put on the table with all the toppings and people can add their own toppings as they prefer  

Wednesday, March 11, 2020

Lemon Garlic Butter Chicken and Green Beans Skillet-Whole30

Lemon Garlic Butter Chicken and Green Beans Skillet
Prep time: 10 minutes
Cook time: 20 minutes
Yields: 3 servings
Ingredients:
            3-6 skinless, boneless chicken thighs
            1 pound green beans, trimmed
            3 tablespoons butter or ghee, divided
            4 garlic cloves, minced
            1 teaspoon paprika
            1 teaspoon onion powder
            ¼ teaspoon salt and fresh cracked black pepper
            Juice of ½ lemon
            ½ cup chicken stock
            ½ cup fresh chopped parsley
1 Tbl hot sauce (like Frank’s red hot original)
¼ tsp red pepper flakes (optional)
Instructions:
1.     In a small bowl, combine onion powder, paprika, salt, and pepper. Season chicken thighs generously with the spice mixture. Set aside while you prepare green beans.
2.     Arrange green beans in a microwave-safe dish with ½ cup water. Cook in the microwave for 8-10 minutes until almost done but still crisp.
3.     Melt 2 tablespoons butter/ghee in a large skillet over medium-low heat. Lay the seasoned chicken thighs in one layer in the skillet. Cook for 5-6 minutes then flip and cook another 5-6 minutes, until cooked through and is at 165 degrees. Transfer chicken to a plate and set aside.
4.     In the same skillet, lower the heat and melt the remaining tablespoon butter/ghee. Add chopped parsley, garlic, hot sauce, red pepper flakes, and precooked green beans and cook for 4-5 minutes, stirring regularly. Add lemon juice and chicken stock and reduce the sauce for a couple of minutes, until slightly thickened.
5.     Add cooked chicken thighs back to the pan and reheat quickly. Adjust seasoning with pepper.
6.     Serve and enjoy!


Friday, January 3, 2020

Jacob’s Rolls

Plowman House Rolls
Jacob learned how to make these rolls from Brenda Plowman

2 tablespoons SAF yeast
½ cup warm water
1 tablespoon sugar

1 ½ cups whole milk
½ cup butter

½ cup sugar
2 teaspoons salt
3 eggs

6 cups+ King Arthur Bread Flour

In a 2-cup glass Pyrex, melt ½ cup butter ( one stick).  Add 1 ½ cups whole milk to the melted butter and warm in microwave for 60 seconds. Mix gently. 
Set aside to cool enough that it is just warm to the touch. Remember you don’t want anything too hot that will kill your yeast!

In another 2-cup glass Pyrex, fill ½ cup very warm water (like bath water temperature for a baby
Stir in 1 tablespoon sugar to dissolve.
Add 2 tablespoons yeast and stir to dissolve.
This should bubble up within 3-5 minutes indicating your yeast is active!

In bowl of stand mixer with dough hook attachment, add 
½ cup sugar, 
2 teaspoons salt &
3 beaten eggs and mix slightly.

Add butter/milk mixture and mix to combine.

Add yeast/water mixture and mix to combine.

Add 5 cups flour and start mixer on low speed and gradually increase speed.  Your dough at this point should look like banana bread dough.
Slowly add your last cup+ of flour.  You want your dough to pull away from the sides, but not from the bottom.  

Allow your machine to knead for a good 3-4 minutes until dough is smooth and elastic.  

Pull dough from bowl.  Butter bowl and return dough.  Cover with plastic and allow to proof for up to one hour, until it has about doubled in size.  To hurry this first rise along, place a pan of hot water at the bottom of your cold oven and the covered dough on a higher rack.

Once dough has risen, punch dough down to deflate.  

Shape rolls using the C-pinch method and place on parchment-lined ½ sheet pans.  Give each roll an ittty-bitty pat of butter on each top and gently cover again with plastic wrap.

Depending on the size you want your rolls, you could yield anywhere from 24 large or 40 small rolls per batch.

Allow for a second rise in a warm place—this could be in your garage, outside in the shade or in your oven with the proof function orrefresh your pan of hot waterand replace at the bottom rack of your oven.

Allow to rise for approximately 30 minutes until shaped rolls are nearly doubled in size.  
Set pans aside to preheat oven to 350 degrees.

Bake rolls for 12 minutes and then check for doneness.  You want a golden brown top with very light brown sides.  Depending on your oven temperature (if it runs hot or runs cooler) keep adding a minute or two.  This is the time you have to WATCH YOUR ROLLS! 

When you take from oven, immediately skate a stick of butter across each roll to give a nice glisten.

If you can, wait a good 5 minutes to let your beauties cool enough before slathering in more butter and popping in your mouth!

Tuesday, November 19, 2019

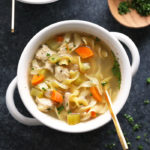
Chicken Noodle Soup-Crockpot-Whole30

I MADE THIS WITH PRECOOKED, DEBONED ROTISSERIE CHICKEN FROM COSTCO ADN IT WAS DELICIOUS!  

SLOW COOKER CHICKEN NOODLE SOUP

Need a hot soup that warms the soul and is the perfect remedy when under the weather? Make our Slow Cooker Chicken Noodle Soup.
  • PREP TIME:30 minutes
  • COOK TIME:4 hours
  • TOTAL TIME:4 hours 30 minutes
AUTHOR: Lee Hersh
YIELD: 6-8 1x
CATEGORY: Dinner
METHOD: Slow Cooker
CUISINE: American

INGREDIENTS

  • 4 medium carrots, diced (1.5 cups)
  • 4 large celery stalks, diced (1 cup)
  • Mushrooms (optional)
  • 3 cloves garlic, minced (2 heaping tablespoons)
  • 1/2 medium yellow onion, finely diced
  • 1.5 lbs. boneless, skinless chicken breast
  • 2 tablespoons coarse Italian tuscan seasoning*
  • 6 sprigs of thyme
  • 6 sprigs of rosemary
  • 1 tablespoon Franks hot sauce (or white vinegar)
  • 8 cups chicken broth
  • 1/4 teaspoon salt
  • 3 cups egg noodles*
  • optional: fresh parsley for topping

INSTRUCTIONS

  1. Begin by creating an herb bundle by tying 
  2. a piece of string around your fresh thyme 
  3. and rosemary.
  4. Then, place all raw ingredients 
  5. (minus the egg noodles) inside of your 
  6. crockpot and stir. Make sure your chicken 
  7. breasts are fully submerged in liquid.
  8. Set crockpot to high and cook for 3-4 
  9. hours OR low and cook for 6-8 hours.
  10. Once your chicken is tender and fully cooked, remove and slice into small chunks. Put back into soup and mix.
  11. Add 3 cups of egg noodles to the slow cooker and mix again. Place the top back on your slow cooker and let sit for 10 minutes in order to cook the noodles.
  12. Serve with a sprinkle of fresh parsley.

NOTES

*We use coarse Italian seasoning, which is an amazing spice blend. If you do not have a coarse Italian seasoning, we recommend using 2 teaspoons normal Italian seasoning, 1 teaspoon dried minced garlic, 1 teaspoon dried minced onion, 1 teaspoon red pepper flakes, and 1 teaspoon dried red and 
green pepper.

For this recipe, we used egg noodles. 
If you use a different kind, adjust time
Nutrition is for 6 servings.

NUTRITION

  • Serving Size: 1/6
  • Calories: 330
  • Sugar: 9
  • Fat: 8
  • Carbohydrates: 32
  • Fiber: 2
  • Protein: 34

Sunday, November 17, 2019

Kylee's Chewy Pumpkin Chocolate Chip Cookies

Kylee's Chewy Pumpkin Chocolate Chip Cookies

  •  Prep Time: 45 minutes
  •  
  •  Cook Time: 10 minutes
  •  
  •  Total Time: 1 hour, 10 minutes
  •  
  •  Yield: 18 cookies

Description

I’m confident you’ll love these pumpkin chocolate chip cookies! Omitting the egg, using melted butter, and blotting the pumpkin guarantee a chewier texture.

Ingredients

  • 1/2 cup (1 stick or 115g) unsalted butter, melted & slightly cooled
  • 1/4 cup (50g) packed light or dark brown sugar
  • 1/2 cup (100g) granulated sugar
  • 1 teaspoon pure vanilla extract
  • 6 Tablespoons (86g) pumpkin puree (see note)*
  • 1 and 1/2 cups (190g) all-purpose flour (spoon & level)
  • 1/4 teaspoon salt
  • 1/4 teaspoon baking powder
  • 1/4 teaspoon baking soda
  • 1 and 1/2 teaspoons ground cinnamon
  • 3/4 teaspoon pumpkin pie spice
  • 1/2 cup (90g) semi-sweet chocolate chips, plus a few extra for the tops

Instructions

  1. Whisk the melted butter, brown sugar, and granulated sugar together in a medium bowl until no brown sugar lumps remain. Whisk in the vanilla and blotted pumpkin until smooth. Set aside.
  2. Whisk the flour, salt, baking powder, baking soda, cinnamon, and pumpkin pie spice together in a large bowl. Pour the wet ingredients into the dry ingredients and mix together with a large spoon or rubber spatula. The dough will be very soft.  Fold in 1/2 cup semi-sweet chocolate chips. The chips may not stick to the dough because of the melted butter, but do your best to combine them. Cover the dough and chill for 30 minutes or up to 3 days. Chilling is mandatory.
  3. Remove dough from the refrigerator. Preheat oven to 350°F (177°C). Line two large baking sheets with parchment paper or silicone baking mats.
  4. Roll the dough into balls, about 1.5 Tablespoons of dough each. Using the back of a spoon, slightly flatten the tops of the dough balls. (Without doing so, the cookies may not spread.)
  5. Bake for 10-12 minutes or until the edges appear set. The cookies will look very soft in the center. Remove from the oven. If you find that your cookies didn’t spread much at all, flatten them out with the back of a spoon when you take them out of the oven. Press a few chocolate chips into the tops of the warm cookies, if desired.
  6. Cool cookies on the baking sheets for at least 10 minutes before transferring to a wire rack to cool completely.  The longer the cookies cool, the even better they taste! The flavor gets stronger and the texture becomes chewier. I usually let them sit, uncovered, for several hours before serving. Chewiness and pumpkin flavor are even stronger on day 2.
  7. Cookies stay fresh covered at room temperature for up to 1 week.

Notes

  1. Make Ahead & Freezing Instructions: You can make the cookie dough and chill it in the refrigerator for up to 3 days. Allow to come to room temperature, then continue with step 3. Baked cookies freeze well up to three months. Unbaked cookie dough balls freeze well up to three months. Bake frozen cookie dough balls for an extra minute, no need to thaw. Here are my tips for how to freeze cookie dough.
  2. Pumpkin: Squeeze as much of the moisture out of the pumpkin puree as you can before adding it to the cookie dough. I simply squeeze the puree with paper towels. See photo in the post for a visual. This will help produce a less cakey cookie. Less moisture is a good thing here! Measure 6 Tablespoons AFTER the pumpkin has been squeezed/blotted. Do not use pumpkin pie filling.
  3. Pumpkin Pie Spice: If desired, you can use 1/4 teaspoon each: ground nutmeg, ground allspice, and ground cloves instead of pumpkin pie spice. If doing so, don’t leave out the cinnamon.
  4. Bigger Batch: Cookie recipe can easily be doubled by doubling each ingredient. Chill the cookie dough for 45 minutes.